Firebird from plastic bottles. Swan made of bottles. Birds with their own hands. I attach a bag from a bottle to the top of my leg, forming a thickening. Then I attach long feathers to it, forming the necessary shaggy legs.
Bird crafts have always been very popular among lovers of home art. Figures of feathered creatures are especially relevant on Bird Day, which is celebrated in the spring of April 1 in kindergartens and schools. The holiday is dedicated to the return of migratory birds and marks the onset of spring and the renewal of awakened nature. On this day, children of all ages make bird crafts, and older schoolchildren make birdhouses and hang them on trees.
Bird crafts can be made from a wide variety of materials: cotton pads, colored paper, plastic bottles, salt dough, natural and any materials at hand. There are many options for creating birds - from simple ones for small children to complex ones, which schoolchildren can easily master, resorting to the help of adults.
We bring to your attention a few lessons on how to create birds with your own hands. step by step instructions, diagrams and tips. We hope that they will help you learn all the subtleties of this exciting process and be filled with new bright ideas.
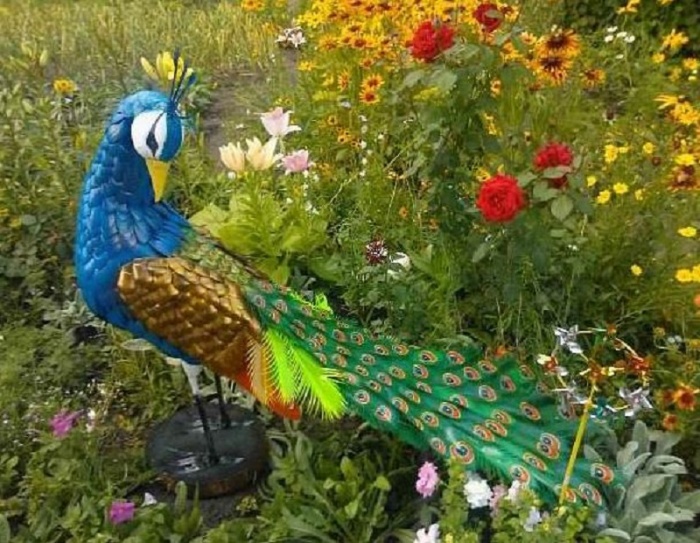
Peacock for a summer cottage from plastic bottles - a master class

We will need: plastic bottles of various colors, polystyrene, a wooden block as a stand, a metal rod, foil and thin colored plastic, a glue gun.

Step one, Cut out the body of the peacock together with the head from the foam, not forgetting to make small indentations in place of the eyes. We attach it to a wooden block with a metal rod, which plays the role of legs.

Step two. We make a sufficient number of peacock feathers from plastic bottles of different colors. We need three types of feathers: long for the tail, short for the neck and slightly longer for the body. To do this, cut off the bottom and neck of the bottle and cut it lengthwise into 3 parts.
We round off one end of each strip with scissors and cut its edges into thin stripes so that it looks like a bird's feather. We decorate the rounded end of the feathers intended for the tail with two or three multi-colored ovals made of foil and plastic. You can attach them with a stapler.


Step three. Cut out the beak from the red plastic bottle and fasten it in place. Next, step by step, using a glue gun, we glue the feathers on the body of the bird, starting with the tail and ending with the neck. We attach the feathers with a little overlap, as shown in the photo. Do not forget that medium-length feathers are intended for the body, and gentle ones - for the neck.

Step four. We cut out a crest of any shape from colored plastic, which our imagination prompts, and glue it on the head. Using acrylic paints, draw the eyes of the peacock. You can glue eyelashes cut from a clear plastic bottle to them.

Step five. We start making the tail, using an abrasive mesh for this. We make holes at the base of the feathers and attach them to the mesh using a thin wire.
We start making the tail from the end, gradually laying the feathers on top of each other in rows, until the luxurious long tail of the bird is fully formed. After that, we attach it to the body and put a peacock, made with our own hands from plastic bottles, on a site among flowers and greenery.
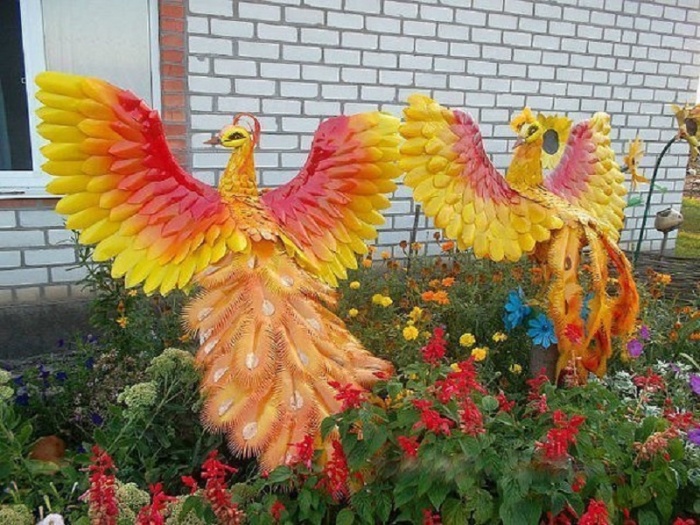
Do-it-yourself salt dough firebird - master class

For Bird Day, together with children, you can make a voluminous firebird from salt dough. The work will take little time, require very little materials and will provide the children with a cheerful and festive mood.
We will need: salty dough, gouache or watercolors, colorless varnish.

Step one. Making salted dough. To do this, mix a glass of flour with a glass of salt and knead the dough by pouring 100 ml of brewed starch into it. We prepare it as follows: dilute a tablespoon of starch in 100 ml of cold water and pour a glass of boiling water into this mixture.

Step two. Divide the salted dough into 5 pieces and paint them in different colors. To do this, add gouache or watercolors to each piece and knead it slightly again. Next, we draw a sketch of a firebird and sculpt the details of the bird on it: wings and a body. Dry them in the oven at a low temperature.

Step three. We make the tail of a fabulous bird. We draw stencils of feathers and sculpt them from pink and blue salted dough on them. Dry the feathers in the oven. Next, we paint all the details of the bird with paints, cover it with colorless varnish, and connect. We decorate a colorful festive panel with crafts. The salted dough firebird is ready!
Birds from cotton pads - master class

Another very cute craft that is perfect for decoration kindergarten on a wonderful holiday Bird Day. It's easy, fun, and fast. Young children can be involved in making birds from cotton pads.
For creativity we need: cotton pads, wooden skewers, colored paper, narrow colored ribbons, plastic eyes, glue and scissors.
Operating procedure:
- We take 5 cotton pads to create one bird. We cut one disk into two halves, and leave four whole.
- We fix two pairs of cotton pads on the skewer with glue so that it is inside. One pair of discs plays the role of the bird's head, and the other - the body.
- We glue the halves of the cut cotton pad to the body on both sides - these will be our wings.
- We glue the eyes and beak cut from a piece of colored paper to the head, and decorate the bird with a ribbon. A cute baby bird from cotton pads is ready for Bird Day!
Colored paper owl - master class

You can make cute owls for celebrating Bird Day at school with your own hands from colored paper. We will need directly colored paper itself, scissors, double-sided tape and glue.
Operating procedure:
- We make a cylinder from a sheet of colored paper, glue its edges on one side, as shown in the photo, and press the middle so that we get ears.
- Cut out a heart out of paper and glue it to the bottom of the cylinder - these are the legs of an owl.
- We cut circles of the same size and glue them on the central part of the cylinder as plumage. In order for the circles to add volume to the craft, it is better to stick them with double-sided tape.
- Cut out a triangle of the same color as the legs, and glue it in the upper part of the plumage - this is the beak.
- Lastly, glue the eyes by cutting out circles for them from black and white paper. The do-it-yourself owl is ready!
Do-it-yourself bird of paradise made of polymer clay - master class

Delightful birds of paradise are made from polymer clay that hardens in the air. This modern material is also familiar to us under the names "self-hardening plasticine", "mass for modeling" and "velvet plastic". To make charming feathered creatures, we need an aluminum wire with a diameter of 1 mm, polymer clay, foil, scissors, round nose pliers, a stack, a glass for rolling out clay, a little patience and diligence.


Operating procedure:
- We create three birds at once - while we sculpt one, the rest dry up. Cut a wire twice as long as the planned tail. We wrap half of the wire with foil, crushing it and forming the body of the bird.
- We make paws from wire, as shown in the photo, and insert them into the body. We take a piece of clay, shape it in the shape of a sausage, then roll it out and flatten it. Carefully take out the wire from the bird, place it inside the clay sausage, rolling it up with a glass. Insert the finished colored ponytail back into the body. In the same way, we make the blanks for the other two birds.
- We take a piece of blue, yellow and red clay, roll them out and gradually, smearing them with our fingers, stick them around the birds until all the foil is covered. We will have three blanks of bright birds.
- Starting from the center, we stick around the legs. Then we take a piece of clay of the corresponding color and make the cheeks, crown and beak. We sculpt eyes from balls of black clay, not forgetting to squeeze the upper and lower eyelids around them with a stack.
- Create a tail and a tuft. To do this, we cut off several wires of the desired length and roll them into clay. When it is dry, round off the tips with round nose pliers and insert the tail details into the bird's body. We make shorter feathers from thin clay sausages by twisting the tips.
- We make the plumage effect by putting pieces of clay rolled out in the form of droplets on the body and working with a needle in the direction of feather growth. With the help of a needle, we make feathering all over the bird's body. For shine, the eye can be varnished. The wonderful DIY bird of paradise is ready!
More ideas and schemes for crafts birds from various materials
For needlewomen who are familiar with the isothreading technique, it will not be difficult to create pictures with beautiful white swans with their own hands and decorate a holiday dedicated to the Day of Birds with them. Threads for creativity are better to take floss or iris. Draw a swan on the seamy side of the cardboard and draw waves. Divide the drawing into details, drawing figures of different sizes, and embroider using the isothread technique.


A very charming feathered creature is obtained from woolen threads. You can easily create it with your own hands according to a simple and understandable scheme.


And according to this scheme, by introducing children to creativity, you can make a bird of happiness from a beautiful bright fabric.

Even small children can create such a colorful bird from circles of colored paper.

A charming bird can even be made from a strip of colored paper and a clothespin.

A do-it-yourself bird for Bird Day can be placed in a nest glued from paper plates.

Simple clothespins in the hands of a craftswoman can turn into an extraordinary fairy bird.

And finally, ideas for making birds from natural and scrap materials: cedar or pine cones, painted feathers, cardboard and plasticine.


If you live in a private house or have a summer cottage, then you have probably come across a desire to transform your flower bed or front garden. The easiest way is to go to the store and get a cute plaster figurine. Yes, she will decorate your yard, but every second gardener has one. To add some zest to your garden plot, you can make a beautiful bird from ordinary plastic bottles. You will spend more effort and time, but the result is worth it.
First, collect plastic containers for all neighbors and friends. Bottles of any color and size will do. The more you collect this material, the larger your craft will be.
The second stage is the manufacture of plastic feathers. From one bottle, on average, 3-4 feathers are obtained. Cutting them out is easy with regular scissors. Just cut off the neck and bottom of the bottle, and cut the middle part into oblong oval blanks. To add texture, cut the fringe around the edges. Feathers of different sizes are needed for one bird.
You also need to prepare a base - a solid wooden board. Bird feet and wings can be made from thin plastic pipes. The torso and head are cut out of Styrofoam and wrapped with a mounting mesh (or metal mesh). Self-tapping screws are needed to attach the feathers. Also prepare a can of polyurethane foam, paint in cans and a little corrugated pipe.
And now you will learn about the secrets of making some examples of works.
Wood grouse
This bird has a bushy tail and its head is raised up. It is these characteristics that must be conveyed when making crafts. Fasten the cuts from the plastic pipe to the board - these will be the legs. Cut the body and neck out of polystyrene, connect together with polyurethane foam. Attach a metal mesh in the shape of a circle to the back of the body and cut out the wings from it. After that, begin to fix the feathers of an oval oblong shape with self-tapping screws. You need to move from bottom to top and from back to front, constantly overlapping the caps of the screws of the previous row. The beak is two plastic triangles, and the eyes are large black beads. Feathers are painted from green, red, yellow and white spray cans.

Owl
For the manufacture of such a bird, it is better to use brown plastic bottles. The owl's feathers are short, but lush, so the edges of the plastic blanks need to be slightly scorched with a lighter. This will add texture to the craft.
The torso and head must be cut out of Styrofoam, placed on plastic tubes and secured to a wooden stand. Then, moving from the bottom up, you need to fix the feathers on the screws. The eyes are made of white plastic and the pupils are made of disposable spoons. The toes are cut from a thin corrugated hose.
You can paint an owl with golden paint from a spray can.


Stork
White (milk) and brown plastic bottles are suitable for making a stork. For the wings, the blanks should be with a fringe, and for the body without it. On the neck, you need to cut strips from bottles and make a fringe on one side.
Two long plastic tubes are attached to a stable board. A ten-liter canister is located on them at an angle, with the neck up. Slightly curved scraps of a thin pipe are attached to the sides, and a larger diameter pipe must be fixed in the hole of the canister. The canister and wing sections are wrapped in a metal mesh. Plastic oval blanks are gradually fixed on them.
The stork's head is made from an old ball and its beak is cut from a plastic bottle.
After manufacturing, you only need to paint the head with white paint and paint the eyes, and cover the beak and legs with red paint. The stork is impressive in size.


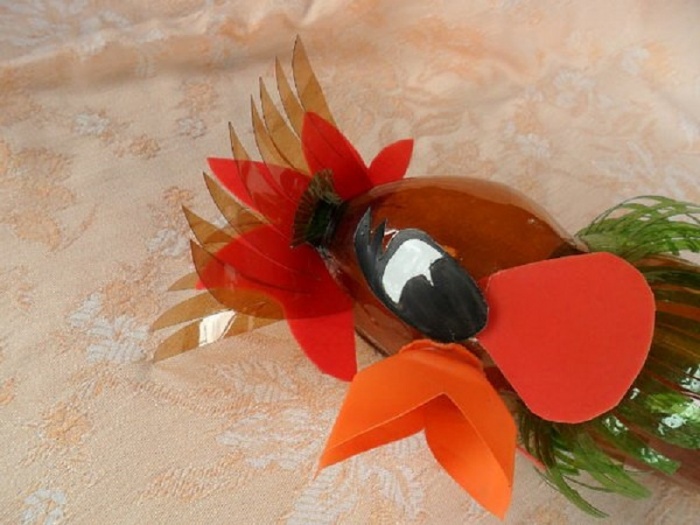
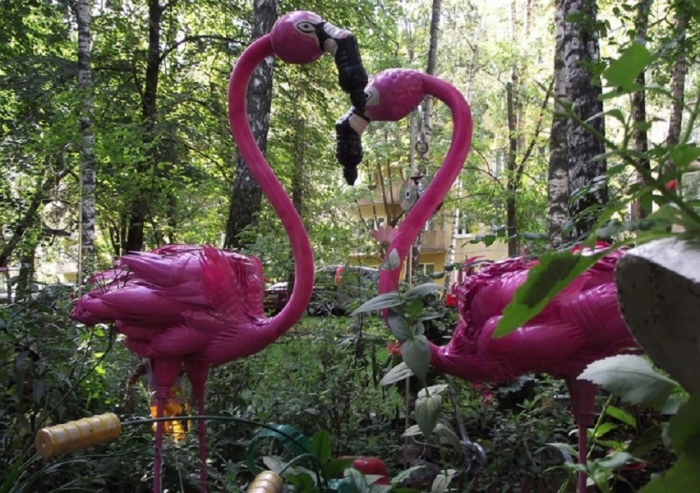
Flamingo
This bird has long legs, a thin, elongated neck and a large beak. Plastic bottles of any color are suitable for its manufacture. The body is a large canister, from the bottom of which the legs are attached - long thin tubes. Fingers are pieces of a corrugated hose. From the same hose, you need to make a neck, passing it through a strong wire to give the neck the necessary bends. The head is cut from dense foam.
The craft should be painted in a pale pink color, and the beak in white and black tones. The bird's eyes are made of beads.


Such original decorations for a summer cottage can be made from waste material.
Do you have a lot of unnecessary plastic bottles at home? Do not rush to throw them away - you can "breathe" a second life into them, turning bottles into magnificent products - birds. How to do this and what you need for this, read on.
In order to start creating, you first need to stock up on material for creativity. We will need:
- plastic bottles (of any volume: five-liter can be, one and a half-liter can be used);
- scissors;
- cellophane bags (preferably colored);
- Scotch;
- foil;
- stapler;
- acrylic paints;
- colored paper or cardboard;
- brushes;
- rope (you can take a fishing line).
Having prepared all of the above, you can start creating!

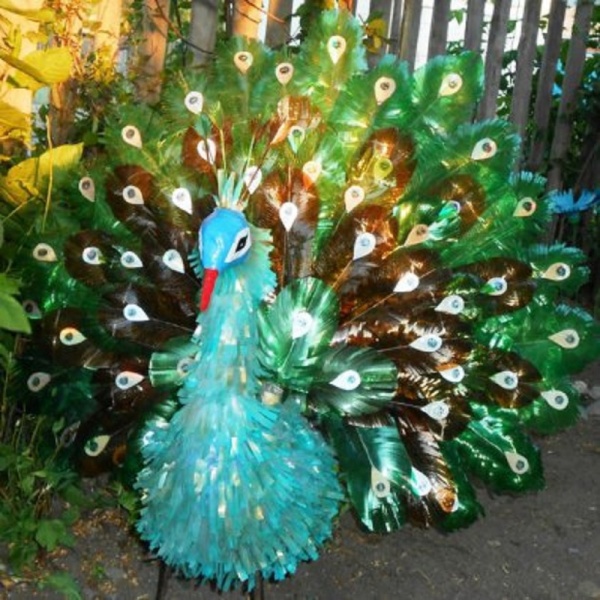
Peacock from plastic bottles
To make a peacock bird that will update your yard no worse than, you need one five-liter plastic bottle, one two-liter and ten one and a half liters.
Before you start making poultry, you need how to handle bottles: rinse them, dry them, peel off the labels.
We start with the peacock's tail. We take a one and a half liter bottle, remove the neck and bottom with scissors. Cut the rest of the bottle lengthwise into three oblong "tongues". We round one end of this "tongue" in the form of a feather and cut into small strips along its edges. Then we cut out a small circle from the plastic bag (it is better to take the bag in blue). Cut out a smaller circle from the foil. We put on a plastic pen first a circle from a bag, then - from a foil and fasten it all with a stapler. Using a similar technology, we make nine more such feathers so that the tail turns out to be fluffy, like a real peacock.
After all the feathers are done, you need to take a large bottle and cut a semicircle out of it. We attach all feathers to the edges of this semicircle with a stapler.
Now that the tail is ready, it's time to move on to the body of the bird. The body is made from a large five-liter bottle. Pre-cut off the neck of it. Then we take a two-liter plastic bottle, cut off the bottom of it. Now insert the two-liter bottle into the five-liter bottle and glue both parts with tape. It turned out the "body" of a bird, where the body is a five-liter bottle, and the neck is a two-liter one. We make the bird's head from the neck left over from a five-liter bottle. We cut the neck across and twist it into a long funnel so that we get a "beak". Now we take the bottom left over from the two-liter bottle, insert our "beak" into the bottom and fix it with tape. The peacock's head is ready! Gently attach it to the body using tape.
It remains to cover the bird with feathers. Feathers are made from plastic bags. We cut into long strips and twist them at the ends with scissors. We attach to the body of the bird with tape, starting from the neck and moving to the tail. We wrap the beak with red paper or a red plastic bag. Eyes can also be made of paper or cardboard, but if you plan to put the peacock on the street, it is better to paint both the beak and the eyes with acrylic paints - papers and cardboard can be washed off under the influence of weather conditions. The peacock crown is made of foil. You need to draw a small crown on it and cut it out. We attach the crown to the peacock's head with tape.
The final piece of art is attaching the tail to the peacock's body. The tail is attached with a rope (or fishing line), but first you need to make a support for the peacock. To do this, in the final part of the body we make a hole where we insert a stick or pole - with the help of it the peacock will stand securely. We tie the tail to the body - that's it! The peacock bird from plastic bottles is ready! You can put the creation on a flower bed or decorate a garden with it - the bird of paradise will create the impression of a marvelous garden and, undoubtedly, will delight the eye.

Flamingos from plastic bottles
"Pink flamingo, child of the sunset" ... Making a flamingo from plastic bottles with your own hands is quite simple. You just need to stock up on imagination, patience and the necessary props. We will need:
- five-liter plastic bottle;
- twenty plastic bottles with a volume of one and a half liters (for making a tail);
- a plastic hose half a meter long;
- acrylic paint in pink, black and white;
- Scotch;
- stapler;
- scissors;
- metal bending pole;
- rope (or fishing line).
By analogy with the tail of a peacock, we make a tail of a flamingo: cut out "feathers" from one and a half liter bottles and cut strips at their ends. Do not forget to round off the top of the "feathers" with scissors. Paint them with pink acrylic paint and leave to dry. Then we cut out a semicircle from a large bottle and attach the "feathers" to it with a stapler.
Using the same technology, we make wings: five feathers from bottles on one wing and five on the other (if you want, you can make more - the wings will look more magnificent). We also cut out two semicircles from the plastic bottle, and attach the feathers with a stapler: on one wing, and on the other.
The tail is ready, now we proceed to the body of the bird. We take a large five-liter bottle, cut off the neck of it. We paint the bottle with pink paint and dry it.
While the torso of the flamingo is drying, you can craft its neck and head. We paint the hose pink and also leave it to dry. Meanwhile, paint over the neck of a five-liter bottle - this will be the head of a flamingo. Next, we make a beak: we take the remains of plastic bottles and cut out two triangles from them: one larger, the other smaller. We fold the triangles in half and fasten them to each other with a stapler. It is worth remembering that the upper part of the peacock's beak is larger than the lower and rounded at the bottom, so the large triangle should be placed above the smaller triangle, having previously rounded its ends down with scissors. It remains to paint the beak: half with pink paint, half with black. The beak is ready!
Do-it-yourself decorative elements from plastic bottles will help add bright colors to the summer cottage. Crafts vary in degree of difficulty, but they always become the subject of attention of others. Many birds from plastic bottles are performed according to a similar algorithm, only the outlines and details differ. The options for their manufacture will be discussed below.
Handy materials and nuances of the registration process
The creative imagination of the master is able to create a masterpiece from ordinary things. In addition to bottles, other available materials are used to decorate birds:
- Plastic cans serve as an excellent base for the bird's body.
- Polyurethane foam helps to give the desired volume.
- Styrofoam will help to make the bird's head as close as possible to the original.
- Self-tapping screws, wire or glue are used to connect the parts together.
- Poultry legs are trimmed with a corrugated pipe, twine, or parts are cut out from plastic containers.
- Small bottles of dairy products help shape the legs of the bird.
- Moisture-resistant acrylic paints and anchor varnish transform the nondescript silhouette of the bird beyond recognition.
To cut and connect all this, you will need scissors, a stationery knife, a stapler, an awl. This is a basic list that changes depending on the selected bird model.
Comment! The beauty of the craft is largely determined by the quality of the plumage. If you want to decorate the site with a spectacular bird, please be patient to make a large number small and large feathers.
Novice craftsmen can be offered a simple step-by-step guide, where a peacock acts as a bird from plastic bottles:

Advice! Pre-filling the body with sand will help to give the bird's figure stability.
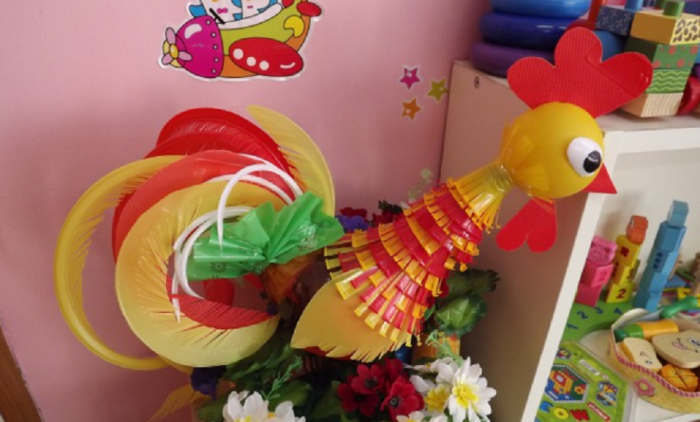
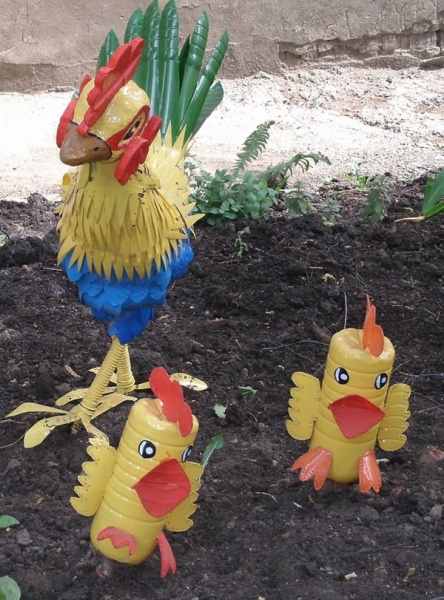
Making a bird using the example of a rooster
Having gained experience with light crafts, you can move on to a more complex process. The proposed algorithm on how to make a rooster out of plastic bottles will be an excellent guide for making other birds as well.
Materials at hand:
- a plastic canister and a 5 liter bottle;
- PVC pipe about 40 cm long;
- containers of 1.5 liters for thighs - 2 pcs.;
- many bottles for plumage.
Frame
Process of creation:
- The work begins with the formation of the bird's frame. The side of the plastic canister is cut and slid to the side.
- The pipe is given the desired shape, after which it is screwed to the body of the bird with self-tapping screws.
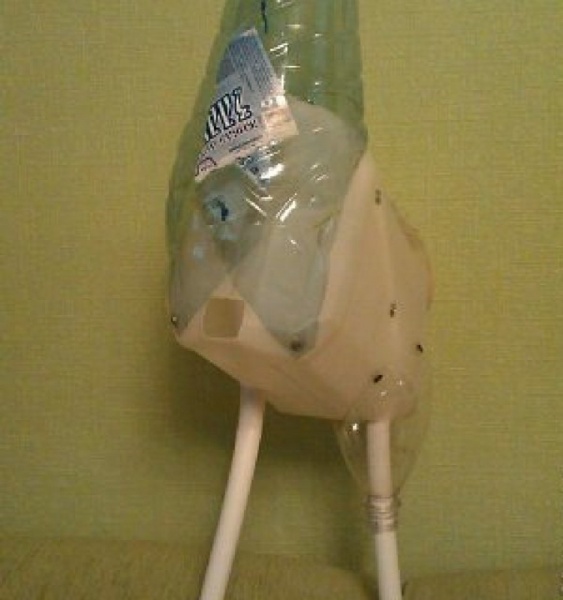
- The cock's neck is made from a 5 liter plastic bottle, rolled up in a bag. Depending on the chosen bird model, the elements can be replaced with other parts. For example, another piece of plastic pipe is perfect for the neck of a flamingo.
- The rooster's legs have a thickening at the top, bags from 1.5 liter bottles will perform the function of thighs. For other birds, the volume of containers is selected in proportion to the figure. The elements put together represent a similar framework:
Head
The rooster's head is cut out of polystyrene foam. If it is difficult to cut a solid figure with a comb and a beard, you can prepare all the elements separately, and then glue them together. Sometimes this part is also formed from a plastic bottle. So that in the future the foam blank can be easily dyed, the following measures are carried out with it:
- carefully processed with sandpaper;
- covered with acrylic putty;
- after the composition has dried, it is re-sanded to give a smooth surface;
- a layer of PVA glue is applied.
Elements of the bird's head are decorated at the discretion of the master. The eyes can be painted with paints or finished parts can be fixed. Various crests, scallops are cut out of plastic or foam. The beak is often made from a tight plastic container (usually a shampoo container).

Plumage
The size of feathers varies not only in different birds, but also on one figure:
- The back, sides and breast are usually decorated with medium-sized feathers.
- Smaller elements are cut into the neck.
- The wings and tail are most often formed from long feathers.
Comment! Feathering bottles are propped in the same color so that, after staining, they get an even shade over the entire figure.
They begin to form the plumage from the thighs, fixing each subsequent row so that the attachment point of the previous one is not visible. The work is carried out using a wire, threading it into the holes prepared with an awl, or with self-tapping screws.
After the legs, they move to the rest of the body, leaving the back free, where the bird's wings will be attached. In order for a rooster to stand firmly on its feet from plastic bottles, it needs to make paws. The frame is made of rigid wire, subsequently it is fixed on plastic pipe... Then the base is processed with a corrugated tube or twine.

The most difficult step for many may be the formation of the wings and tail of a bird based on plastic bottles. For these purposes, a reinforcing mesh is usually used. The size of the base for the wings and tail is selected depending on the species characteristics of the selected bird. For example, a peacock's tail feathers can be attached to an oval piece of linoleum. But mesh is a more common option. The elements are fixed with an overlap, each row covers the fastening of the previous parts.
The moment of complete assembly of all elements from plastic bottles can be carried out before or after paint application. At the finish line, they are painting. A bird with the same plumage throughout the body can be decorated after complete assembly. It is more convenient to paint the elements of the frame, tail and head separately, and then connect them using self-tapping screws and wire.
Review of interesting ideas
The versatility of plastic bottles allows you to make crafts of various degrees of complexity. One and the same bird can be presented in different variations, and its production is not always a laborious process.
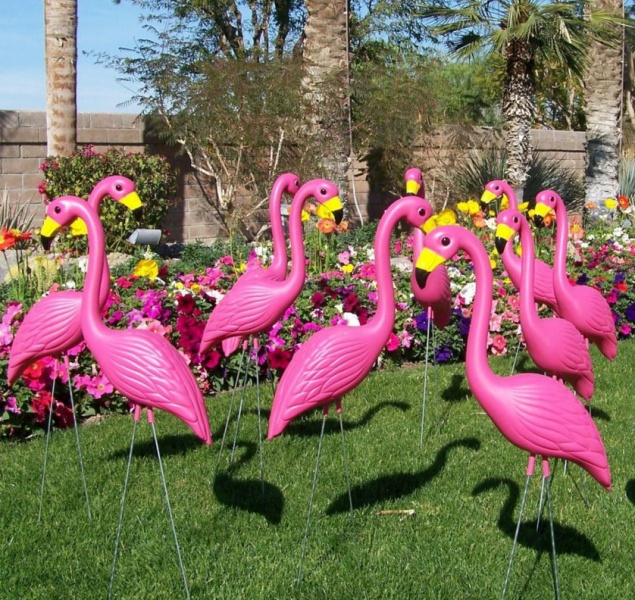
Bright pink handsome flamingos will help to add exoticism to the site. Guided by the algorithm proposed above, you can make a bird in short time thanks to the large plumage. Various options are presented in the photo:

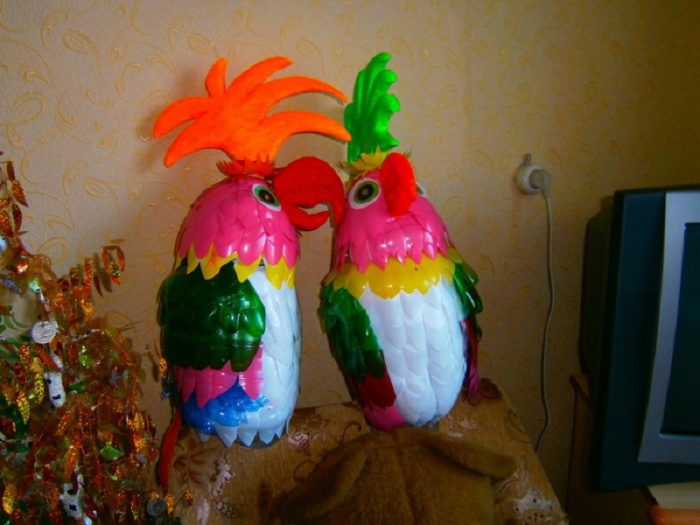
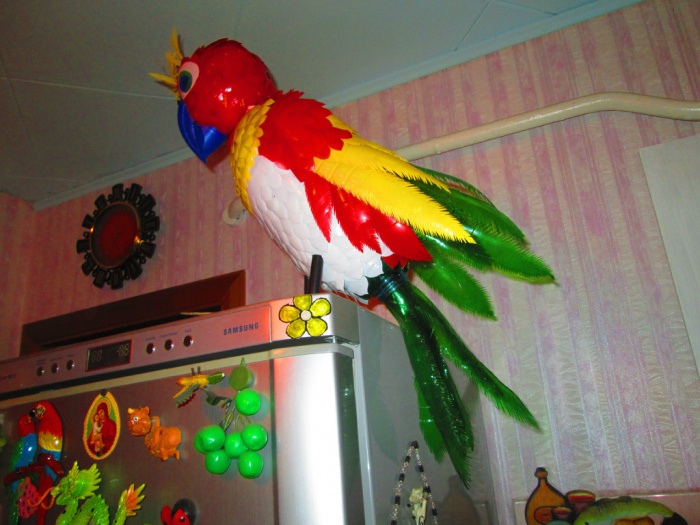
Another cute bird in hot countries is the parrot. Here, much determines the originality of the color. The plastic bottle body can be covered with feathers or simply covered with paint. The complexity of the feathers and tail is chosen at the discretion of the master. The design methods are shown in the photo:


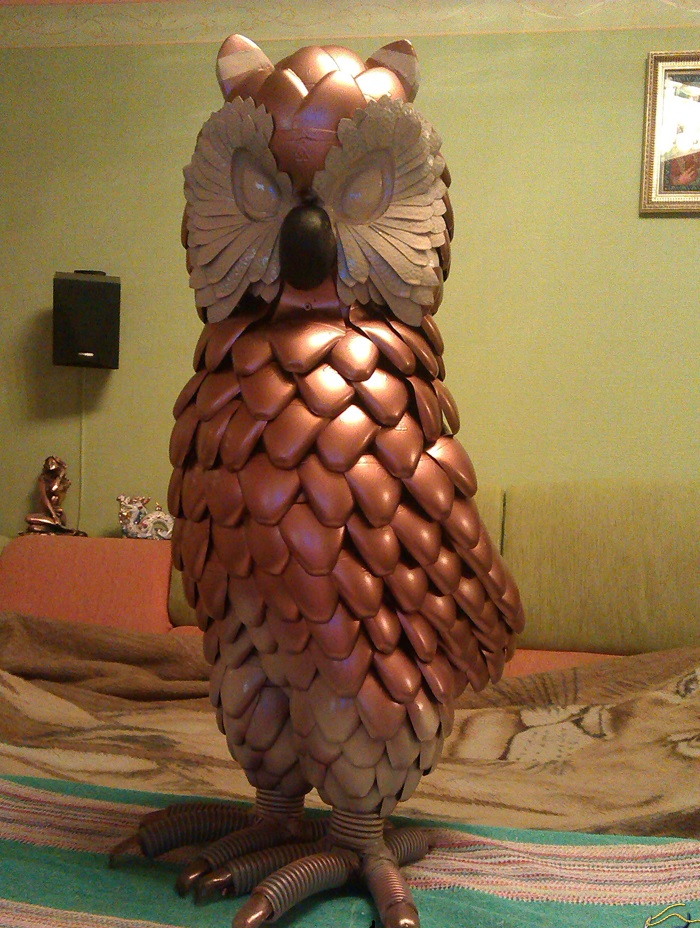
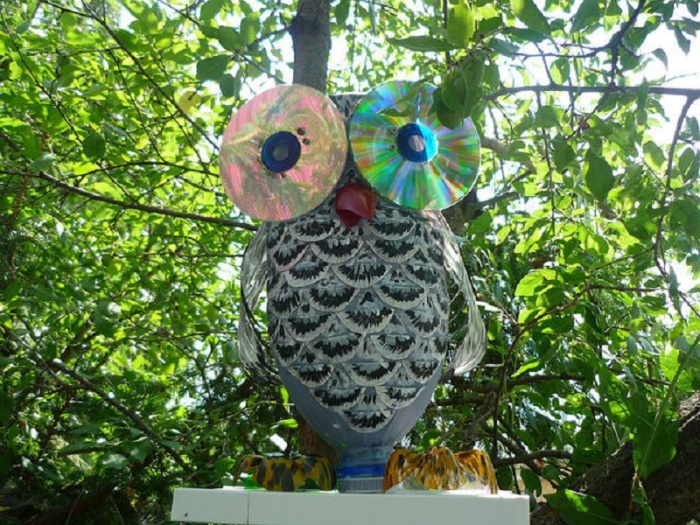
An owl or an eagle owl, familiar to our regions, is another worthy decoration of the garden. An imposing, handsome man made from plastic bottles can take a long time.
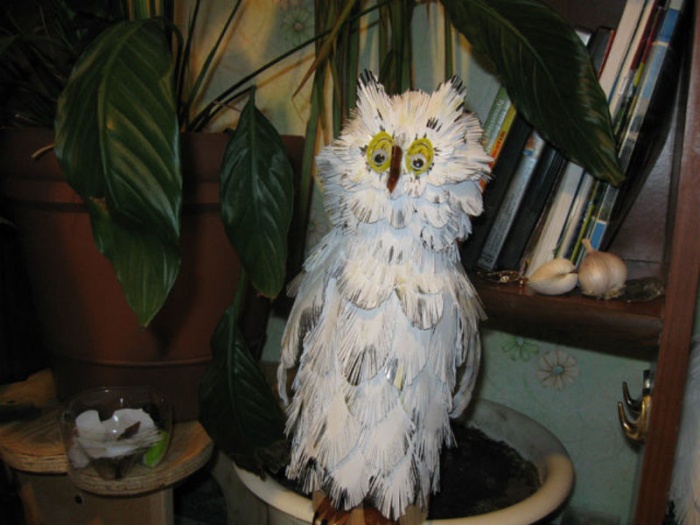
For busy people, there is a simplified version of the night bird.
A peacock will help you get closer to the scenery of the royal court. The gorgeous tail of the bird will not leave anyone indifferent. Make the peacock bright or white, leave the tail folded or straightened - the owner of the site decides. Or maybe you liked such a firebird?

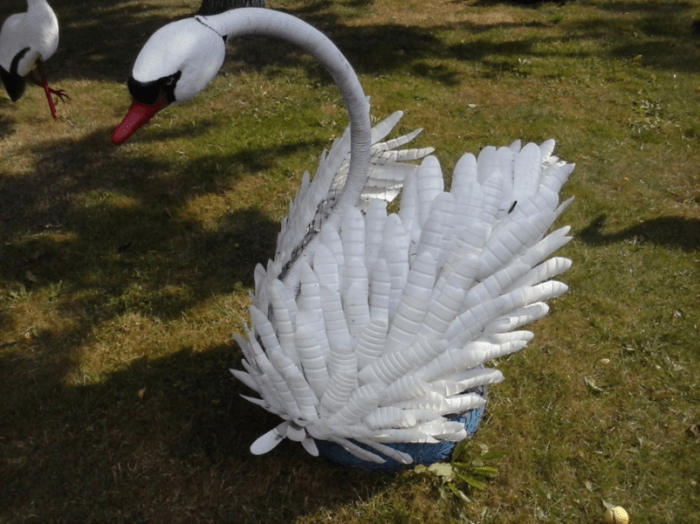
Perseverance and patience will require a chic dove, for the manufacture of which white plastic bottles will come in handy. It is better to prepare the plumage on long winter evenings, when all work in the garden is suspended, so that by the spring the site will be transformed with a new resident.


On which bird model to stop, it's up to the craftsman to decide. The process of making any craft can be facilitated by replacing jewelry-made parts with simpler elements from plastic bottles.
1. Weld a frame of rods, if you make a smaller bird, then you can twist the rods tightly with wire.
2. The body of a 10 liter canister, I cut a strip on the upper part and shift it back - I attach it with self-tapping screws. I cut out feathers from 2 liter bottles and close the resulting hole.
3. On the wire I put on "fingers" cut off from the tubes, nails from bottles.
4. The very foot is a hose from the vacuum cleaner. I fasten it with self-tapping screws.
5. This is what the leg looks like.
6. I attach a bag from a bottle to the top of my leg, forming a thickening. Then I attach long feathers to it, forming the necessary shaggy legs.
7. It looks like this up close.
8. For the head, I glue two pieces of construction foam with Titan glue.
9. Remove the excess with a hacksaw.
10. I highlight the beak.
11. Shaping.
12 Sandpaper to smooth, deepening the eye sockets.
13. I put in my eyes - (For soft toys.)
14. I strengthen the beak with a detail from the bottle, glue the eyelids to the eye.
15. I make the neck out of a 5 liter bottle.
16. Neck front view.
17. I fasten the feathers to the neck with wires through the punctures with an awl. I glue "Titan" to my head. In the recesses of the head, I additionally attract with self-tapping screws.
18. I cut flight feathers from 3 - liter bottles. The width of the feather is 6-7 cm. I attach it to a metal mesh with a wire through punctures with an awl.
19. Second and subsequent rows - feathers from 2 liter bottles. 8 pcs. from one bottle.
20. Another row of feathers.
21. Finished wing on top.
22. Flip the wing over to attach the feathers to the bottom.
23. In the lower part of the wing, the feathers should be straight, for this I use only the middle of the bottles (no rounding.)
24. This is what the lower part of the wing looks like.
25. I attach the wings to the base,
then I will close the connection with feathers,
attached to the front side and bent on the lower part of the wing.
Alena wish you good luck and creative success. Don't forget to share new work with us.
Crane
1. For the head I use 10 cm thick construction foam. I saw off the desired piece with a hacksaw (about 30 cm on the long side).
2. Cut off unnecessary parts.
3. Round off all the edges.
4. Divide the head into approximately three parts, where the lower two-thirds of the cheeks.
5. I round off all the details, select the beak, cutting it off quite thinly. Cut holes for the eyes.
6. I enlarge the eye sockets, narrowing the head to the beak.
7. I grind the head with sandpaper, highlighting the details. I cut out the eyelids from thin foam. Eyes from a soft toy.
8. All the same, but from the front.
9. I glue a strip from the bottle to the beak until the glue dries, fix it with electrical tape.
10. All the same, but from the front.
11. So I pierce and connect the feathers.
12. From the middle of the large bottle, cut out the flight feathers (width 5 cm), 9-10 per wing.
13. A couple more rows of cover feathers.
14. We also cut the secondary flight feathers from a bottle, but shorter, fasten them in a semicircle, slightly covering the first ones (the wing is slightly folded).
15. Wing.
16. For a 30L tail, I cut the bottle across into strips of 5-7cm, and connect it with a fan.
17. Slightly lift the edge of the net at the back and screw the tail. The next row is again from 1.5L bottles.
18. Side view.
19. I cover my back with feathers from 0.5 liter bottles.
20. From the bottom, I will cover the wings with feathers cut from the middle part of the bottles (they should not bend).
21. Two rows will turn out, the joints will be closed with feathers bent from the front side.
22. Finished wing.
23. Wings bottom view.
24. I make a torso. In this case, the frame is welded, but you can twist all the parts with wire.
25. There is a hose from a vacuum cleaner on the neck, a body-canister from machine oil.
26. I put plastic tubes on my feet, cut the legs out of a 0.5 liter bottle.
27. I screw the hose to the head with a long self-tapping screw (grease it with glue).
28. I cut off the handle from the canister, remove the part from above (needed for work), the thickening of the legs ("legs") from the tops of 2L bottles.
29. Feathers for the body also from 2L bottles. From one you get six pieces. You need both short and long.
30. I close the body completely.
31. At the bottom of the neck there is a fringe made of halves of 2L bottles, covering the connection of feathers.
32. It remains to connect the parts.
33. I painted this crane with aerosol paints, the result pleased.
Stork
To make storks, we need:
1. Two cans of 5 l
2. Metal mesh for the wings
3. Strong wire
4. Plastic tubes for legs and neck
5. Styrofoam for the head
6. White milk bottles
7. Dark beer halls, 1.5 l each
8. The hose from the vacuum cleaner (can be replaced with a corrugation)
1. For the head I use construction foam 10 cm wide
2. I cut out the workpiece, highlight the eye sockets, make a flat beak.
3. Grind to smoothness with sandpaper, insert eyes (or beads)
4. I glue the eyelids, strengthen the beak with a part of a plastic bottle, gluing it to the Titan. I make the beak of the second stork open.
5. For the body I take a 5L canister.
6. I cut off the handle.
7. I bend the net into the shape of the canister - the wings of this AISTA will be folded.
8. Round off the "wings".
9. I bend the wire for the legs.
10. One liter milk bottle is cut into 6 feathers.
11. I cut the feathers.
12. I begin to fasten the feathers from the lower part of the body.
13. I reinforce the neck wire and put a hose on it.
14. I screw a row of feathers to the hose with self-tapping screws.
15. Side view.
16. I cut the halves of milk bottles into fringes and fasten them around the neck with tape.
17. I start with the flight feathers at the edge of the wing.
18. The second row overlaps the first one by one third.
19. The third and subsequent rows of white bottles.
20. Paws from 0.5 l bottles.
21. Making a torso for the second stork.
22. As with the first, I cut off a part of the canister from above - you need to screw the feathers.
23. I cover the body with feathers, but, unlike the first, I fasten the feathers to the entire canister.
24. This stork has wings slightly open. The first row of feathers from 1.5 l bottles (6 pcs from one)
25. I screw the second row only to the curvature of the wing.
26. The third is for the whole wing.
27. I make a tail, it is short, feathers are slightly spread.
28. Flip the wings over to screw the feathers onto the underside.
29. The last row, covering the edge of the wing, is made of feathers bent in half, rounded on both sides.
30. This is approximately how it looks.
31. Each of the subsequent feathers covers the junction of the previous one.
32. We fasten the wings with self-tapping screws and paint the birds.
