How to make cool avto VKontakte. Photoshop tutorials - how to make an avatar with sparks yourself in Photoshop
Create a new document of size 300 on the 320 pixels, resolution for example 100 . Background color is white.
Create a new layer " Heart". Turn on the mode " Quick mask"(Quick mask / Q key).
Select the tool (“Free Shape Tool” / “U” key) and find the suit colors.
Let's start with the heart. In black in " Quick mask"(Quick mask) draw a heart while holding the" Shift».
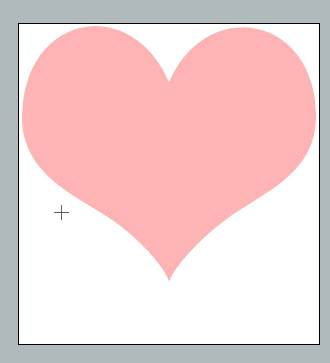 Turn off the mode " Quick mask"(Quick mask) by pressing the" Q"And get the selection.
 Next, go through the menu (Edit - Fill / Shift + F5). Fill with white.
Then (Selection - Invert / Shortcut "Shift + Ctrl + I").
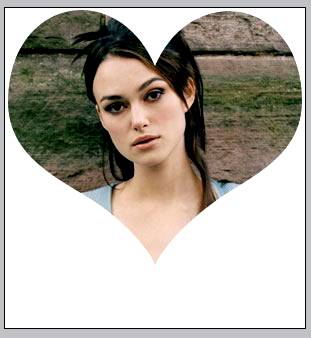
Open the photo you want to have in the shape of a heart. Select the desired area, copy. Paste in the file we are working with and transfer the layer under " Heart».
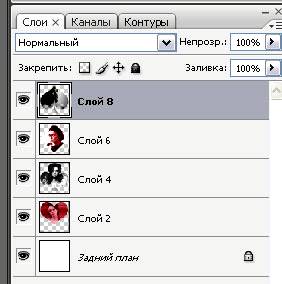
We create " New layer»Above the photo layer. Fill it with red. Change the blending mode to (Soft Light) (or experiment).
The photo layer is discolored in any way. The easiest way to click " Ctrl + Shift + U". However, you can not discolor if you like it more.

Holding Ctrl, click on the heart layer in the layers window (F7). Once the red filled layer is active, click " Delete". Then also on the photo layer.
Glue the layers " red fill»With a photo. Layer " Heart»Can delete. The worms are ready!
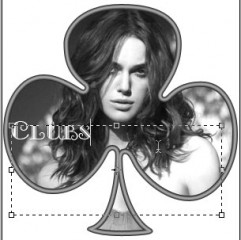
Do the same with three other photographs, as shapes of spades, bubi and cross. Only when working with crosses and peaks there is no layer with a red fill. Leave the photos just black and white.
You need the type of photo you want (darker or lighter), achieve with (Image - Correction - Levels / Keyboard Shortcut "Ctrl + L"). Please note that the suits are different in size. Peaks in height, for example, are larger than worms. But all suits should be the same size - approximately 300 pixels.
You can do each suit in a separate document, but, in my opinion, it is more convenient in one. Just hide the unwanted layers for a while.
Having done all four suits, you should get something like the following:
Now need to increase canvas size. However, if we do this right away, then we will see parts of the photo outside the desired shape. Therefore, on each photo layer, do this: (Selection - All / Keyboard shortcut “Ctrl + A”). Right-click on the canvas and click " Layer Via Copy»(Cut to a new layer / With the selected tool). Then delete the resulting unnecessary layers (if you worked with each suit in a separate file and then simply pasted one, you do not need to do this).
We call through the menu (Image - Canvas Size / Keyboard Shortcut "Alt + Ctrl + C"). Set size 300 on the 1300 pixels.

Then we have all our suits to taste. I recommend alternating between red and black (if you want clarity in the arrangement of suits, make the tool active (the "Move" tool / V key), and then hold down " Shift», Press the up or down arrow, counting the number of clicks).
We get approximately the following result:
Make a stroke of our suits ((Layer Style - Stroke)).
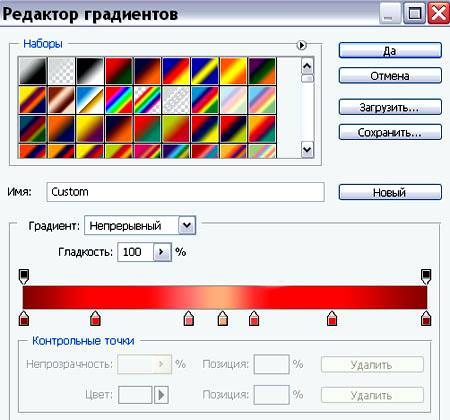
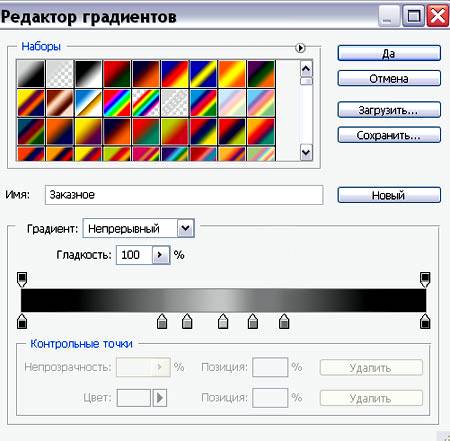
Make the gradients like this (you can copy the picture to your file so that you can use the color picker from there).
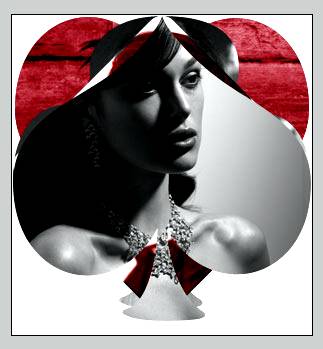
We get the following result.
How to make an avatar for use in contact, etc.?
Wow and summer turned out this year! Everything is sticky, including brains ... Heat, do not want to do anything. But questions come in and these questions need to be answered. This is exactly what we are going to do today.
The topic of the next article includes the answer to the question: How to create an avatar for a contact in online photoshop yourself .
Each user wants to have their own distinctive features (their ava) in various social networks, such as " In contact with". Most often it is for this network that requests to make an avatar are received. And to do it is not at all difficult, especially using online photoshop.
By the way - avatars can be animated and static. By the way, we have both of them on our site, and if you are too lazy, you can download avatar sets from our website and use them for yourself. Today we will learn how to do static avu. You can make an animated avatar yourself using various free programs for making animations, of which there are so many now. Our task is to describe pthe process of creating avatars in online photoshop .
I must say right away that each person has his own preferences and ideas in what his unique and best avatar should look like. In no case do we pretend to these representations. The task of this article is to clearly demonstrate how you can easily create your own personal avatar on your own. As a result, after reading this article, in a few minutes you can make your favorite avatar for your beloved one (s).
And so - let's get started
. Open online photoshop. As a rule, the standard size of an avatar is 100x100 pixels. We will make avu 200x200 pixels, for clarity. In any case, its priest can always be reduced to the desired size. About how to reduce the size of photos in online photoshop - it is written in other articles on our website.
After opening online photoshop, select "Create a new images" in the central menu. Immediately come up with a name for it, for example my_avatar, (it is better to write the name in Latin letters), set the size of the future avatar - 200x200px and click OK. The basis for future Ava is ready.
 Since the majority of people who want to create an avatar and ask questions on this topic are girls - (no offense to men), we took the following picture as the basis for our avatar: This is a soaring bee. Save the picture on your computer and then upload it to the online photoshop by running the command from the top menu (File-\u003e Open). We got two open documents. The first is our 200x200 pixel blank, the second is a picture of a bee.
Make the bee picture activeand (just click on it) and then press Ctrl + A to select the entire image of the bee picture, then press Ctrl + C to copy the selection to the clipboard.
Click on the blank for the avatar (white background) to make it active. Now press Ctrl + V to insert the bee on the avatar. Left on the layers panel - an additional layer has appeared. You can see what we got on.  Click thumbnail to enlarge.
Small digression . Of course, you can cut the bee along the contours and insert only its body in our avatar, but in this article we show the principle and sequence of actions, and by analogy, when you learn, you can do as you like.
Move the bee layer to move it up, as shown in the figure below.
Now you need to click on the "Background" layer on the right in the "Layers" panel, thereby we will make it active. Select the bottom left in the panel - foreground fill color R-147  G-181 B-42 (as shown in the figure), and then select the "Paint bucket tool G", and click on the white part of the layer. Thus, we have filled this layer with green color. We got a lawn and a bee flying over it.
Now you need to sign our avatar. Add text. Select the tool "Type tool T". An additional window will appear in which we can select the size, font, color, and add an inscription for our avatar.
In order to edit the text, color and size, you need to select the “Type tool T” tool again, click on the text layer in the picture and make changes. What happened with us is shown in the figure.
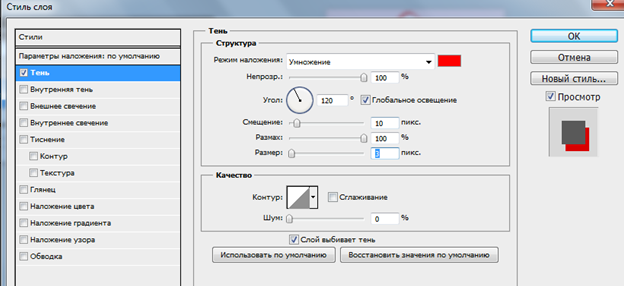
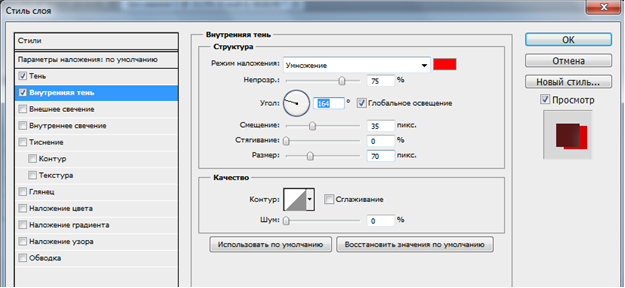
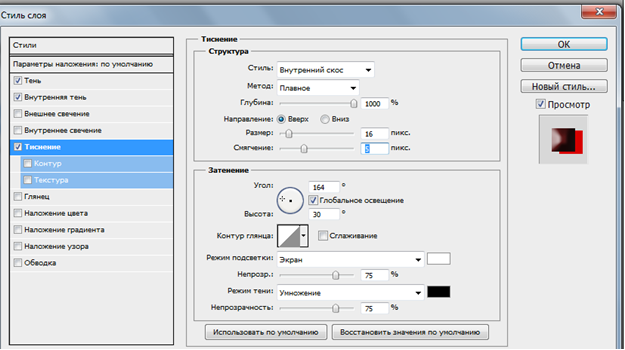
It remains to add effects to the text of our ava. To do this, right-click on the layer with the letter "A", on the right of the layers panel and in the drop-down list - select "Layer styles". After that, click on the upper inscription "Drop shadow" to set the values \u200b\u200bas shown in the figure and click OK.
In addition to one effect that we have applied, on this tab there are several more effects. You can  try to work with them in order to achieve the result that you need.
Here is what happened with us. It remains only to save the avatar on your computer and you can then use it.
Threat. This article describes the easiest way to create avatars using online photoshop. You can try creating an ava based on a rounded rectangle - ("Draving Too l" tool).
Copying of site materials is allowed only with the written consent of the authora
Hello! In one of the past lessons, I showed you , . However, what if you want to get beautiful avatar in photoshopregardless of size, for example, to place it in a contact? Today I will show you one of many ways to decorate my picture! By the way, if you do not want to make any decorations and frames, I recommend reading articles on, and much more. These lessons will also help you make a wonderful avatar!
Let's get started!
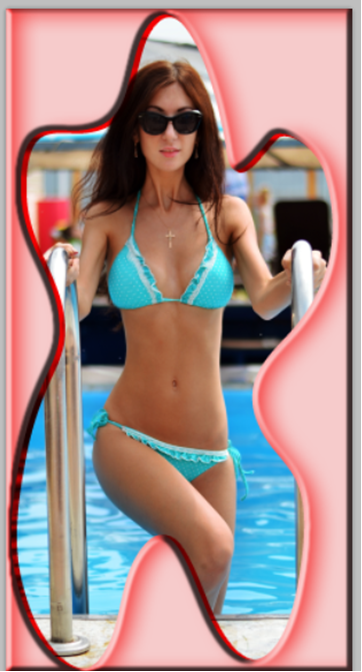
Let's open the photo in the program that we will decorate:
Create a new document with arbitrary width and height of the figure (Ctrl + N key combination). Select the background content in white. Next we will work with a new document:

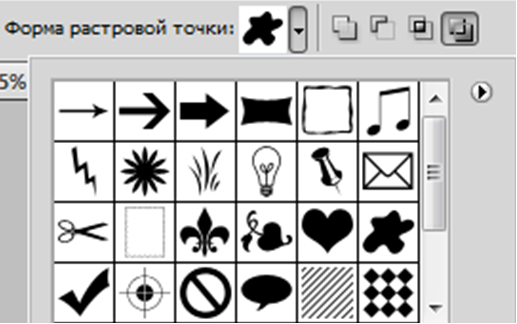
In the toolbar on the left, find the “Custom Shape” #Custom Shape Tool and activate it.

On the top, in the settings panel, select the “Contours” icon so that the figure leaves only its outline on the photo:

To the right in the same panel, select the shape that you like. So, I chose some kind of blot, in your case it can be anything:
Using the left mouse button, place the shape outline on the document you created, like this:

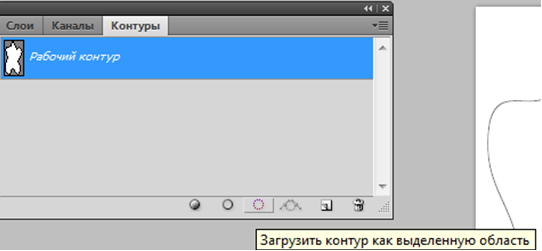
Now we need. To do this, open the Paths panel through the Window menu # Window \u003d \u003e\u003e Paths # Contour. In the dialog box that opens, find the “Load outline as selected area” icon (third from the left) and click on it. After that, an arbitrary shape along the contour becomes selected:
We need to cut it. But not so simple! Since we have a lock with the background layer, the shape will become transparent only if. To do this, go to the "Layers" panel #Lyers, and double-click on the thumbnail of the background layer with the mouse:
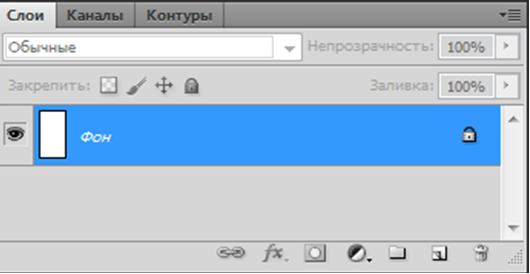
This window will appear. Here you do not need to change anything, just click the "OK" button:

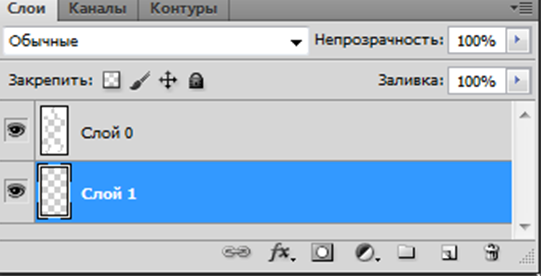
By our previous actions, we unlocked the layer. Can now cut figure (keyboard shortcut Ctrl + X):

Let's go back to the Layers panel and. Using the mouse, drag it down, like this:
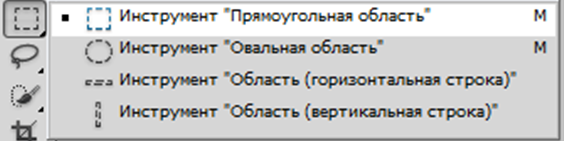
Again, back to our photo, from which we want to make an avatar. On the toolbar, find the “Rectangular area” #Rectangular Marquee, select a photo with it and copy it (Ctrl + C keyboard shortcut):

Let's move on to the created document and paste our photo into a new layer (Ctrl + V):

Is the photo not up to size? This is easy to fix. Use the keyboard shortcut Ctrl + T or go to the Edit menu: Edit \u003d.\u003e Free Transform: FreeTransform to activate this command. Now, using the left mouse button, pull the corners of the resulting contour to fit the photo in size, like this:

Once you have decided on the size and location, press the Enter key.

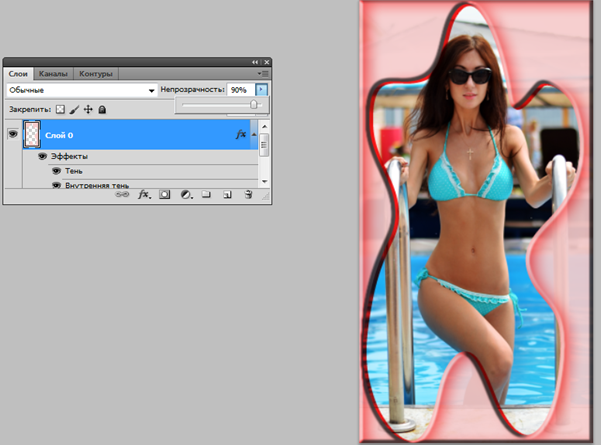
Refer to the Layers menu $ Layes \u003d.\u003e Layer Style $ Layers Style \u003d.\u003e Shadow $ DropShadow. With this command you can make the photo frame more effective and voluminous, I set the following values \u200b\u200bin the window that opens:
Here is the result I got after working with layer styles:
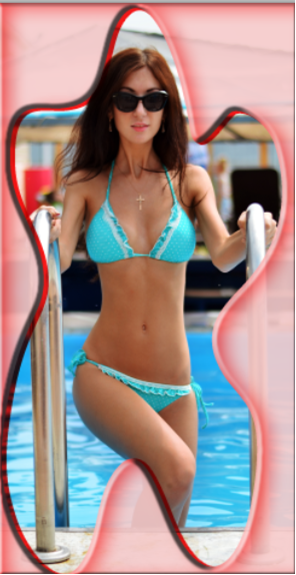
Make the frame a bit transparent. To do this, again go to the "Layers" panel, and by activating the layer with the border, reduce its Opacity from 100 to 90%:
That's all! Today I showed you how to make an original and beautiful avatar in photoshop. Do not forget before completing the work and admire the result in the photo below, good luck!
How to make an avatar in Photoshop? As they say in real life, "meet by clothes", and on the Internet "meet by avatar." Of course, they also pay attention to the nickname, but this is to a lesser extent. The picture is more striking and remembered faster. As a consequence of this, more and more young people are paying attention to this particular element of the design of their profile. And not only young people are wondering how to make an avatar in Photoshop. Sometimes you can read opinions, they say, why do an avatar on your own, if the Internet is full of sites where you can download it for free. The answer to this question lies on the surface. A unique avatar is a sign of individuality. The avatars laid out for general access wander from one site to another. Do you want someone else to have an avatar like yours? We think not. Creating an avatar in Photoshop is an absolutely straightforward process. It’s better to spend a little time and become a happy owner of an individual drawing than to stand out from the main mass of users. http://www.youtube.com/watch?v\u003d-Mt38aCtvfc The very first step is to determine the size of the avatar. If you read the article, it will become a little easier, but pixels are not very important there. Almost all forums and social networks have requirements for the size and weight of the avatar. The most common dimensions are 100x100 px. But not always. In any case, you do not need to do more than the permissible sizes. Then think about what will be shown on the autograph. If you want to place your photo, then choose the highest quality and most beautiful. Take your time. A beautiful avatar in Photoshop should fully characterize as an individual. From the most successful picture we will make an avatar. It should be understood that a large photo with ships or horses will look too small and indistinguishable. For an avatar, choose pictures with large and clear objects.  Launch Photoshop and create a new document. Dimensions should indicate those that are required on the site where the avatar will be posted. Then drag the selected photo or picture into the working window. You have to spend some time until you place the source in a way that suits you. Having achieved the desired result, save a beautiful avatar from Photoshop in any folder on your computer. Most importantly, do not make an avatar in Photoshop larger than required on the site. Otherwise, all work may go down the drain. And it will be a shame. Few people want to waste their time. Now it became clear to you how to make an avatar in Photoshop. As you can see, there is nothing particularly complicated in this process.
